Aura and Rowan were having a combined birthday party this year, and they both love Transformers. So, ever the pesky friend, I told Miki about this fabulous new thing I'd learned about... the frozen buttercream transfer (FBCT). And, then I found a handy little graphic to use for tracing that included everyone's favorite Autobot, Optimus Prime, and a female Autobot, Elita One. But, since I'm just crazy enough to think that this sort of thing is fun, I went to Miki's last Friday to help her try this new technique.

So, armed with a print-out of the image, we prepared buttercream, tinted it the appropriate colors, taped the image to a sturdy plastic cutting board, covered it with plastic wrap, then started tracing.

First, you do the black outline of all the detail, and then you fill in with the colored frosting, filling the image in from front to back. Then, you push the frosting down with a off-set spatula, and even it out, and pop it into the freezer.

When you are ready to use it, you just lay it on top of your frosted cake, and peel the plastic wrap off. Miki did Happy Birthday Aura & Rowan too, and you have to remember to reverse images and text since the image is flipped. There are some great videos on You Tube that demonstrate how to do the FBCT.
Miki did chocolate and vanilla cupcakes, grouped them into a "cake" and frosted with vanilla buttercream, then popped the transfers on (we added colored frosting as background to the letters so they'd be easier to manage). It's a technique I'll be using in the future for sure. I can just see a cake covered in Madeline and Erik's transferred artwork... now that would be cool!


 I love the kids' cookbook, Salad People by Mollie Katzen (of Moosewood Restaurant fame). I've gifted the book to a few kids in the last couple years, although our copy here is from the library. Today, after school, we decided to make the granola, which we (of course) adapted. Neither of our kids like to eat oatmeal, so there's a method to my madness here... I hope it works!


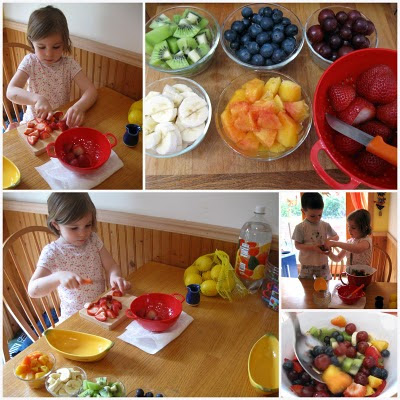
 Strawberries, peaches, bananas (although pineapple next time!), kiwi, blueberries and purple grapes! Divine... I especially love that making it was her idea/request, and that she was so very proud of her creation. She even dished up a hefty portion for me on a dinner plate, complete with a fork and a spoon. Why a spoon? "Oh, Mama, you need the spoon to get those grapes. Otherwise, they just slip away from you — they are just foolish!"

 So, armed with a print-out of the image, we prepared buttercream, tinted it the appropriate colors, taped the image to a sturdy plastic cutting board, covered it with plastic wrap, then started tracing.
 First, you do the black outline of all the detail, and then you fill in with the colored frosting, filling the image in from front to back. Then, you push the frosting down with a off-set spatula, and even it out, and pop it into the freezer.
 When you are ready to use it, you just lay it on top of your frosted cake, and peel the plastic wrap off. Miki did Happy Birthday Aura & Rowan too, and you have to remember to reverse images and text since the image is flipped. There are some great videos on You Tube that demonstrate how to do the FBCT.
 June is all about thank yous — we have several overdue TY's, and what better way to deliver them than customized fortune cookies?! These were relatively easy, quite tasty, and very fun. The kids were pretty impressed. So, who are they for? Well, you'll just have to wait and see if you get a delivery of them!