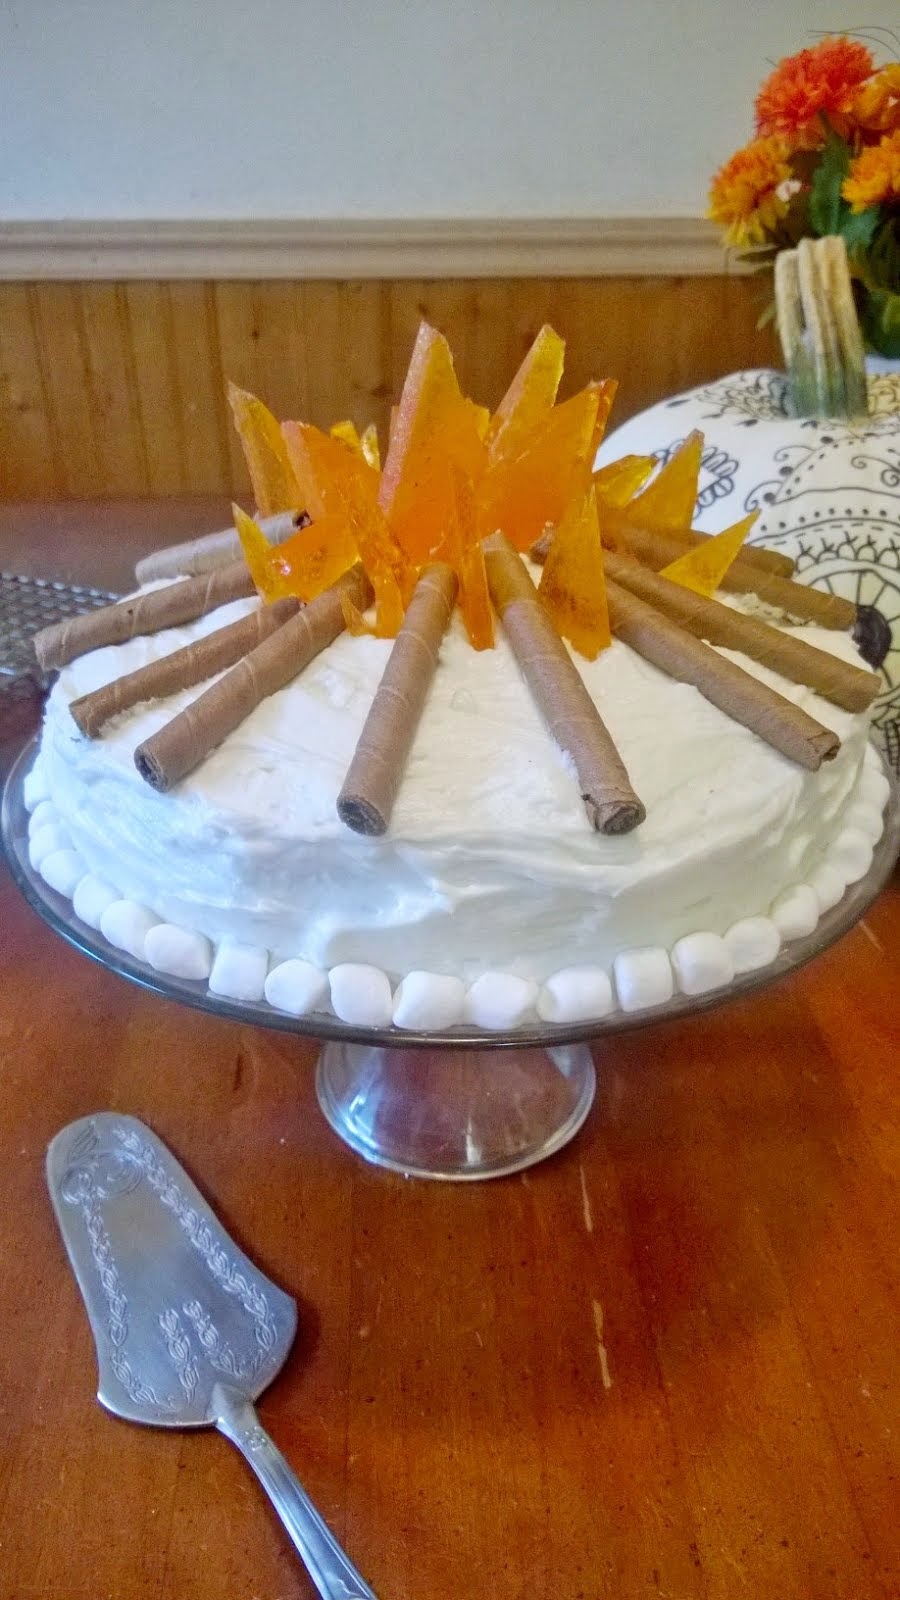
 My Girl Scout troop bridged to Juniors this weekend, so I made them a campfire cake. This hard candy recipe from Allrecipes.com was perfect for the flames, but I would at least halve it (maybe even divide by four) for future use - it made a ton!
Showing posts with label Candy. Show all posts
Showing posts with label Candy. Show all posts
Monday, November 3, 2014
Campfire Cake
My Girl Scout troop bridged to Juniors this weekend, so I made them a campfire cake. This hard candy recipe from Allrecipes.com was perfect for the flames, but I would at least halve it (maybe even divide by four) for future use - it made a ton! 

Sunday, July 27, 2014
Madeline's 9th

She wanted a geode cake, with blue and red crystals. It's a 2-layer 9 x 13 cake, half is vanilla cake with cherry filling and half is chocolate cake with cookies & cream filling. Frosted with chocolate buttercream and topped with Fruity Pebbles geodes frosted in cookies and cream and filled with strawberry and cotton candy rock candy.
She wanted her name on it in cursive, and I bought the amazing minerals poster in Langley at the gem/rock shop for her.
Friday, October 26, 2012
Wicked Witch Treat Mix
So, instead of adding the cute witch hats to a batch of my Wicked Caramel Corn (which would be tasty), we went even easier (but very tasty) with a batch of air-popped popcorn (4 cups? 6 cups?), several cups (maybe 3-4 cups) Rice Chex cerals, 2 cups (or so) of pretzels rods, and about 1 cup of broken pecans mixed together then tossed with one 14-oz. bag of melted Wilton white candy melts, 1/8 cup of orange sprinkles and 1/8 cup of black & orange Halloween nonpareils. I really mostly eyeballed everything in my large rectangular roasting/sheet cake pan. That's how we do things around here. Thankfully, it worked out for us.

We think the pretzel rods look like broomsticks, and the Chex a little like bristles. One child may have suggested that some wicked witches crashed their brooms - oh, the imaginations! Hmm... regardless, this is a tasty and cute treat mix with our witch hats tossed in bags for friends to enjoy!

A Touch of Magic!

So earlier this week, when Erik requested Bugles at the store, I bought some and then remembered those adorable Santa hats, and thought of making witch hats by dipping Bugles in dark chocolate. When we got home, I found that we had green candy melts and butterscotch chips, so we melted both in the microwave, I filled small Ziploc bags with a little of each and piped circles onto parchment paper for the hat bottoms. Then we dipped the Bugles in the melted candy and popped them onto the (slightly hardened) circles.
The kids loved helping with these, and I think that they will be adorable mixed into a new concoction of my Wicked Caramel Corn with Chex and pretzels and nuts (and maybe some Halloween-colored M&M's). Cute and sweet, just like these two!

Wednesday, November 2, 2011
Use It Up!
Leftover Halloween candy? Candy "buy-back?" Make Halloween Bark... Ours was 1/2 a package of Trader Joe's Halloween Joe Joes (crunched up), one small bag of Halloween pretzels, about a 1/2 cup of chopped walnuts, and about 6 mini (assorted) chocolate mini candies, plus mini bags of M&M Peanut and regular. Spread in a 9/13 pan (sprayed, or lined with parchment.
 Then, melt 1 bag of Ghiradelli white chocolate chips and one bag of Wilton white Candy Melts, and pour over the candy/cookie/nut mix. Then, chop another handful of Halloween-sized treats (more M&M's, Three Musketeers, Snickers, etc.), and sprinkle over the top with a healthy amount of pepitas thrown in for good measure (and protein + saltiness), and you get...
  Halloween Bark! Cut into pieces, package, and give to your friends!! Happy Fall. Ours made five sandwich-sized bags full.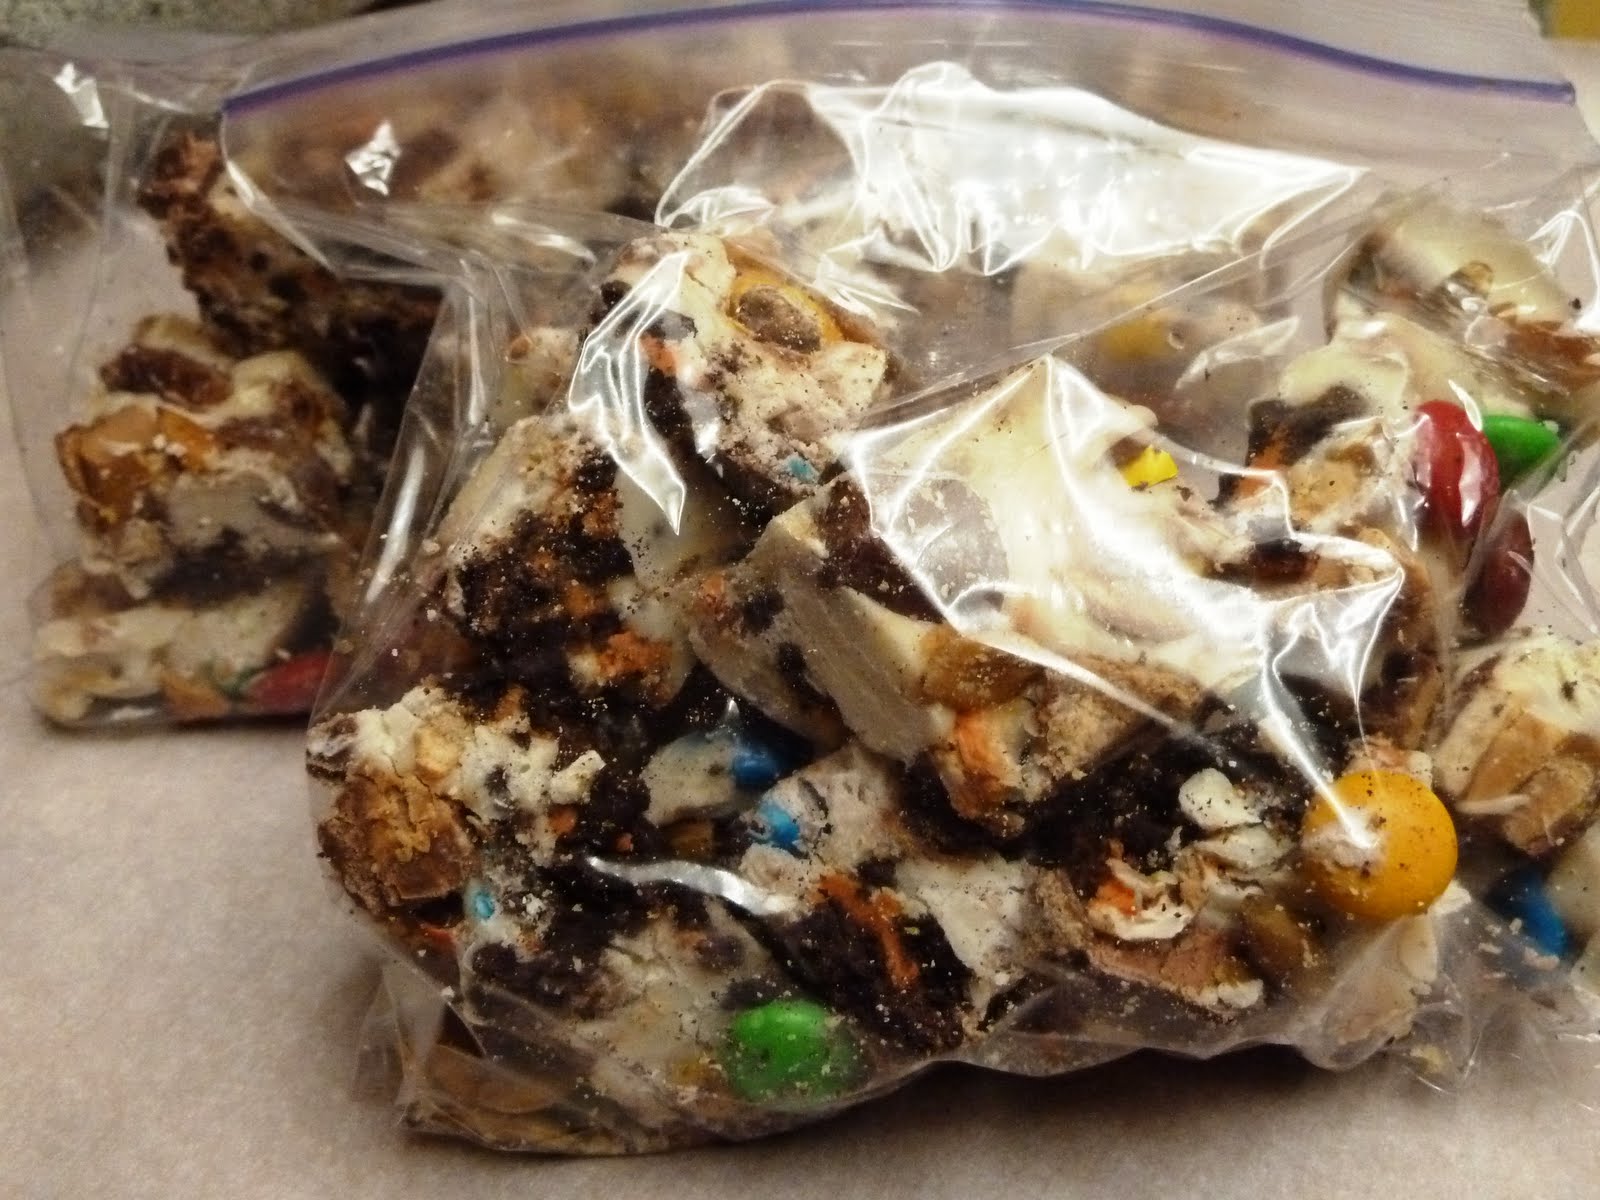
Monday, June 20, 2011
Birthday Cake Fudge
Yes, you read that right. Birthday-cake Fudge. Fudge that looks and tastes like... birthday cake. Tasty and fun; which is just the sort of thing that we love around here. I found the recipe right here. Obviously, I used pink candy-coloring, rather than blue, and all the recipients thought this was fan-tabulous.
 Thank you to Becky at Mrs. Bettie Rocker for the great idea and for posting the recipe! Here's the recipe to print:
Birthday Cake Fudge
3 cups sugar
1 1/2 sticks margarine (yes, I did use margarine - which I'd not purchased in many years... but candy is fickle and so I stuck to the recipe for once!)
5 oz can (2/3 cup) evaporated milk
12 oz chopped white chocolate chips
7oz jar marshmallow creme
3 or 4 Tablespoons yellow cake mix (just the powdered MIX, not batter)
1 teaspoon vanilla
Blue (or red, pink, orange, yellow...) candy coloring (oil-based color, not regular food color)
Rainbow sprinkles
Line an 8 or 9 inch square pan with foil, leaving the ends hanging over the edges of the pan. Spray foil thoroughly with nonstick spray. Place the sugar, margarine, and evaporated milk in a heavy saucepan over medium heat. Bring to a full rolling boil, stirring constantly, and let boil for 4 minutes. Remove from heat.
Add chocolate chips, marshmallow creme, and cake mix, stirring until chocolate chips are melted. Add vanilla and mix well. Working quickly, pour about 1/3 of the fudge in a bowl and add a few drops of blue candy coloring, mixing and adding until you achieve the desired shade. Pour white fudge into prepared pan, spreading evenly. Spoon colored fudge over the top, spacing it out. Using a sharp knife, draw swirls through the blue and white to create a marbled effect. Sprinkle the top generously with rainbow sprinkles before the top sets up.
Let sit at room temperature until cool, then place in the refrigerator until firm.
Recipe via Confessions Of A Cookbook Queen
 Thank you to Becky at Mrs. Bettie Rocker for the great idea and for posting the recipe! Here's the recipe to print:
Birthday Cake Fudge
3 cups sugar
1 1/2 sticks margarine (yes, I did use margarine - which I'd not purchased in many years... but candy is fickle and so I stuck to the recipe for once!)
5 oz can (2/3 cup) evaporated milk
12 oz chopped white chocolate chips
7oz jar marshmallow creme
3 or 4 Tablespoons yellow cake mix (just the powdered MIX, not batter)
1 teaspoon vanilla
Blue (or red, pink, orange, yellow...) candy coloring (oil-based color, not regular food color)
Rainbow sprinkles
Line an 8 or 9 inch square pan with foil, leaving the ends hanging over the edges of the pan. Spray foil thoroughly with nonstick spray. Place the sugar, margarine, and evaporated milk in a heavy saucepan over medium heat. Bring to a full rolling boil, stirring constantly, and let boil for 4 minutes. Remove from heat.
Add chocolate chips, marshmallow creme, and cake mix, stirring until chocolate chips are melted. Add vanilla and mix well. Working quickly, pour about 1/3 of the fudge in a bowl and add a few drops of blue candy coloring, mixing and adding until you achieve the desired shade. Pour white fudge into prepared pan, spreading evenly. Spoon colored fudge over the top, spacing it out. Using a sharp knife, draw swirls through the blue and white to create a marbled effect. Sprinkle the top generously with rainbow sprinkles before the top sets up.
Let sit at room temperature until cool, then place in the refrigerator until firm.
Recipe via Confessions Of A Cookbook Queen
Monday, February 14, 2011
iLove
I LOVE Family Fun magazine's crafts and ideas... so fun! We made a few of these iLove Valentine's for ♥-day! You just need conversation hearts (in boxes), Reese's mini-size peanut butter cups, paper, string, foil, glue/tape, scissors and their cut-out template... easy, fun and sweet!


Wednesday, November 10, 2010
A Very Merry Year: November
So, instead of going crazy with holiday baking last year, I decided that it would be much more fun to spread the joy out over the year and gift someone each month with something lovely from my kitchen.
And, this month, I just happened upon a new recipe that involved wrapping peanut butter cookie dough around a chunk of frozen Snickers candy and baking until golden-brown. I immediately knew who I must make these cookies for—John. He loves peanut butter as much as I do, and loves candy as much as Joel, so these cookies are absolutely perfect for him.
Oh, and he loves cookies too; and we all love him. It even says so in the birthday card that Madeline made for John (complete with rainbow, sunshine, tent, and people). He's a great friend, a fellow cook, hunting partner, fabulous (and very organized) traveling companion (who drives very well on the wrong side of the road -and car- through crazy round-abouts in the UK and Ireland), my best friend's husband... oh, and Madeline and Erik adore him. So, what better for a gift than these over-the-top cookies...

Either unwrap the mini Snickers, or unwrap and cut up larger Snickers. Freeze until the cookie dough is ready.
Preheat oven to 350-degrees F, and line a cookie sheet with parchment (or lightly spray with baking spray w/flour and wipe sheet with paper towel). Cream the butter and sugars in Kitchenaid until light and fluffy, then add peanut butter and combine, next add egg and vanilla, mix until well combined. Add the dry ingredients and blend to finish dough.
And, this month, I just happened upon a new recipe that involved wrapping peanut butter cookie dough around a chunk of frozen Snickers candy and baking until golden-brown. I immediately knew who I must make these cookies for—John. He loves peanut butter as much as I do, and loves candy as much as Joel, so these cookies are absolutely perfect for him.
Oh, and he loves cookies too; and we all love him. It even says so in the birthday card that Madeline made for John (complete with rainbow, sunshine, tent, and people). He's a great friend, a fellow cook, hunting partner, fabulous (and very organized) traveling companion (who drives very well on the wrong side of the road -and car- through crazy round-abouts in the UK and Ireland), my best friend's husband... oh, and Madeline and Erik adore him. So, what better for a gift than these over-the-top cookies...
Happy Birthday, John!

Snickers Peanut Butter
Cookies
(adapted from here)
Makes about 4 dozen cookies
(adapted from here)
Makes about 4 dozen cookies
Mini-size
Snickers bars or large Snickers bar cut into bit-sized pieces
2 sticks butter, room temperature
1 c. sugar
1 c. brown sugar
1 c. creamy peanut butter
2 eggs
4 tsp. vanilla
3 c. flour, sifted
1 tsp. baking powder
1 tsp. baking soda
1 tsp. salt
2 sticks butter, room temperature
1 c. sugar
1 c. brown sugar
1 c. creamy peanut butter
2 eggs
4 tsp. vanilla
3 c. flour, sifted
1 tsp. baking powder
1 tsp. baking soda
1 tsp. salt
Either unwrap the mini Snickers, or unwrap and cut up larger Snickers. Freeze until the cookie dough is ready.
Preheat oven to 350-degrees F, and line a cookie sheet with parchment (or lightly spray with baking spray w/flour and wipe sheet with paper towel). Cream the butter and sugars in Kitchenaid until light and fluffy, then add peanut butter and combine, next add egg and vanilla, mix until well combined. Add the dry ingredients and blend to finish dough.
Scoop dough out of
bowl with a large soup spoon, and flatten the dough in your hand. Place one
frozen Snickers pieces in the center and wrap evenly, sealing around candy. Do
about 6-9 cookies at a time. As many as nine will fit on a cookie sheet at a
time as they do spread a bit. Keep additional candy in the freezer when you're
not shaping cookies to go on a pan to pop in the oven. Bake for about 12-13
minutes. Cool on wire rack, and beware. These are delicious!!
Friday, June 11, 2010
Guava Brigadeiros
I spotted these Brazilian candies on The Cookie Shop blog the other day, and they were a fun little project for the kids and their buddies today. I used guava jelly instead of strawberry jam because that's what I had, and yes, that's just the kind of gal I am. I also had Vietnamese coffee in the pantry the other day when I ran out of my standard Joe's Dark Roast from TJs ($2.99/lb. can't beat that). Clockwise from the top left are: Madeline's, Erik's, Aura's and Rowan's. The ones in the middle were mine. 

Friday, January 22, 2010
Lovely, and 21-years Old!
Happy Birthday to Ro!
Rochelle's birthday being in January, and specifically right when I'm working out and lightening/healthy-ing up the diet, she got a non-fat chocolate cake for her birthday today. Now, don't go away just yet. It's good. Really. Moist and delicious, chocolate-heaven. It really doesn't taste light at all... And, while Ro is also lovely, she's got a couple years on this lovely cake recipe that I've kept for 21 years... I've saved it since I was a sophomore in high school. It's originally from SHAPE magazine, circa 1989, and it's got a nearly fat-free frosting to go with it. But, seeing as I'm far less extremist these days, I skipped that super-healthy frosting in favor of a little bit of chocolate-peppermint buttercream for the filling and sides, and a simple ganache poured over the top. Balance is a good thing. I also grated two Lindor dark chocolate truffles over the top and added some candy-cane hearts and other decor to make a flower shape. You know, because this was a birthday celebration cake!
 Here's the whole SHAPE-approved recipe...
Nonfat Chocolate Cake & Frosting (SHAPE magazine 1989)
1.5 c sugar
1.75 c flour
3/4 c cocoa powder
1.5 tsp baking soda
1.5 tsp baking powder
2 eggs
1 c nonfat milk
1/2 c applesauce
2 tsp vanilla
1 c boiling water
Preheat oven to 350-degrees F. Spray and flour pan/s (really - do it, or the cake will not come out of the pan). Combine dry ingredients, then add all the wet ingredients except the boiling water. Beat on medium speed of mixer for 2 minutes, then stir in boiling water. Bake 35-40 minutes.
Nearly Fat-Free Chocolate Frosting
4 Tbs light margarine
2 Tbs plain, non-fat yogurt
1/2 c cocoa powder
2 c powdered sugar
3 Tbs non-fat milk
2 tsp vanilla
Cream margarine and yogurt, then add cocoa and sugar alternately with milk. Add vanilla, and add additional milk as needed to get the consistency that you want.
Oh, and to do the candy cane hearts... just heat the oven to 200-degrees F, arrange two mini candy canes for each heart in heart shape on parchment and bake for 8-9 minutes. Remove pan, and shape/squish connection points with chopsticks or spoons (so you don't burn fingers), then pop back in the oven for an additional 1-2 minutes. Voila! Wouldn't these be fun Christmas ornaments to hang on the tree? I just found them online last week, and luckily had an extra box of mini candy canes that fit the bill!
Rochelle's birthday being in January, and specifically right when I'm working out and lightening/healthy-ing up the diet, she got a non-fat chocolate cake for her birthday today. Now, don't go away just yet. It's good. Really. Moist and delicious, chocolate-heaven. It really doesn't taste light at all...
 And, while Ro is also lovely, she's got a couple years on this lovely cake recipe that I've kept for 21 years... I've saved it since I was a sophomore in high school. It's originally from SHAPE magazine, circa 1989, and it's got a nearly fat-free frosting to go with it. But, seeing as I'm far less extremist these days, I skipped that super-healthy frosting in favor of a little bit of chocolate-peppermint buttercream for the filling and sides, and a simple ganache poured over the top. Balance is a good thing. I also grated two Lindor dark chocolate truffles over the top and added some candy-cane hearts and other decor to make a flower shape. You know, because this was a birthday celebration cake!
 Here's the whole SHAPE-approved recipe...
Nonfat Chocolate Cake & Frosting (SHAPE magazine 1989)
1.5 c sugar
1.75 c flour
3/4 c cocoa powder
1.5 tsp baking soda
1.5 tsp baking powder
2 eggs
1 c nonfat milk
1/2 c applesauce
2 tsp vanilla
1 c boiling water
Preheat oven to 350-degrees F. Spray and flour pan/s (really - do it, or the cake will not come out of the pan). Combine dry ingredients, then add all the wet ingredients except the boiling water. Beat on medium speed of mixer for 2 minutes, then stir in boiling water. Bake 35-40 minutes.
Nearly Fat-Free Chocolate Frosting
4 Tbs light margarine
2 Tbs plain, non-fat yogurt
1/2 c cocoa powder
2 c powdered sugar
3 Tbs non-fat milk
2 tsp vanilla
Cream margarine and yogurt, then add cocoa and sugar alternately with milk. Add vanilla, and add additional milk as needed to get the consistency that you want.
Oh, and to do the candy cane hearts... just heat the oven to 200-degrees F, arrange two mini candy canes for each heart in heart shape on parchment and bake for 8-9 minutes. Remove pan, and shape/squish connection points with chopsticks or spoons (so you don't burn fingers), then pop back in the oven for an additional 1-2 minutes. Voila! Wouldn't these be fun Christmas ornaments to hang on the tree? I just found them online last week, and luckily had an extra box of mini candy canes that fit the bill!

Thursday, December 17, 2009
Using It All...
This is the "greenest" recipe ever. Seriously. Candied orange peels. You candy the peel, you eat the orange, and you make orange syrup out of the sugar and water you use to candy the peel in! Beautiful. This is going to be a keeper for Christmas treats.
 Candied Orange Peel Slices
5-6 large navel oranges
water
3 cups sugar
Cuts ends off and score the oranges lengthwise, then peel. Slice lengthwise in 1/4-inch slices. Put in pot and cover with water. Boil and drain water three times. Then, add the sugar, and cover peels with water again (just cover, don't fill the pot up). Boil for 35-45 minutes, until the peels are transparent. Drain (save the liquid to boil down for syrup too!) and dump onto a wire rack to cool and dry a bit.
To finish, dredge in sugar, or dip in white or dark chocolate. They are AMAZING!!!
 Candied Orange Peel Slices
5-6 large navel oranges
water
3 cups sugar
Cuts ends off and score the oranges lengthwise, then peel. Slice lengthwise in 1/4-inch slices. Put in pot and cover with water. Boil and drain water three times. Then, add the sugar, and cover peels with water again (just cover, don't fill the pot up). Boil for 35-45 minutes, until the peels are transparent. Drain (save the liquid to boil down for syrup too!) and dump onto a wire rack to cool and dry a bit.
To finish, dredge in sugar, or dip in white or dark chocolate. They are AMAZING!!!
Wednesday, April 8, 2009
Edible Easter Cards
It's that time of year... Easter! It really sneaked up on me this year, but our Easter activities have begun in earnest now. This afternoon, we got busy making our jellybean letter Easter cards for all the sweet cousins (oh, and one for their candy-loving Papa too).
 I let the kids choose the colors they wanted from the bulk Jelly Belly beans at Top Foods, and then drew the first letters of their cousins' names (and their names) on bright, heavy card stock. Mixed up some edible glue (powdered sugar - maybe 3/4 cup - some vanilla powder -optional- and enough water to make a thick glue-like consistency). Then, I let the kids glue the beans on the cards. They loved it! I also put some Edamame (soy beans) out on the table to encourage healthy snacking (in additional to the inevitable jelly bean snitching).
 I let the kids choose the colors they wanted from the bulk Jelly Belly beans at Top Foods, and then drew the first letters of their cousins' names (and their names) on bright, heavy card stock. Mixed up some edible glue (powdered sugar - maybe 3/4 cup - some vanilla powder -optional- and enough water to make a thick glue-like consistency). Then, I let the kids glue the beans on the cards. They loved it! I also put some Edamame (soy beans) out on the table to encourage healthy snacking (in additional to the inevitable jelly bean snitching).
Monday, December 3, 2007
Happy Birthday Grammy!
 Today was my Lil' Grammy's birthday—I know I've posted this pic before, but it's one of my favorites, and she was (and continues to be) one of my favorite people ever. She did things from teaching me cool words like "davenport" to how to really have fun. She also did crazy things like driving herself to the hospital while in labor (but she had to since no one else was handy-Grampa was working). She's dearly missed, but Madeline's definitely got her spunk, and will learn lots of cool things about her as she grows up. Here is her excellent recipe for fudge. Mmmmm...
Grammy's Fudge
3 c. sugar
3 T. cocoa
1 t. salt
1 c. whole milk
1 T. butter
1 t. vanilla
Mix dry ingredients well, dry mashing out lumps. Add 1 c. whole milk and boil, but don't stir, until it forms soft ball in cold water. Remove from heat. Add 1 T. butter and 1 t. vanilla. Cool just until you can stick your finger into it. Stir until it loses its gloss. Spoon on a buttered plate and spread fast with a knife.
Tuesday, October 9, 2007
Wicked Corn!

The most excellent caramel corn ever. Easy and delicious—the quintessential Fall treat!!
Wicked Good Caramel Corn
3 bags popped SmartPop! 97% Fat Free Kettle Corn popcorn
1 cup sliced almonds (or your favorite nut)
1/2 cup light corn syrup
2 cups brown sugar
1 teaspoon salt
1 cup butter (see why you need the fat free popcorn?)
1/2 teaspoon baking soda
1 teaspoon vanilla extract
Scoop the popped popcorn off the top of the bags so you get all popcorn and no unpopped kernels (it's a pain to pick them out later and even worse to bite into one!) into your largest baking pan. I use a roasting pan, but you could use two pans as well. Add the nuts to the popped corn, and put the pan(s) into a preheated 300-degree F oven for about 2-3 minutes while you measure out the ingredients to make the caramel. (This toasts the nuts a little and keeps the popcorn crisp). Then remove pan from the oven.
Stir together the syrup, sugar, butter and salt in a saucepan. Bring to a boil over medium heat, and bring to boil. Once boiling, cook and stir constantly for 5 minutes.
Remove from heat, and stir in the vanilla then the baking soda. The caramel will go lighter and foa up. Pour over the popcorn in the pan(s), and stir to coat as well as you can (as you bake it you'll be able to cover more of the corn).
Bake for about 45 minutes stirring the corn every 10-15 minutes. Pour out to cool on counter on freezer paper, grocery bags or waxed paper. Store in Ziploc bags to keep corn crisp (otherwise it'll get soggy and sticky!)
Monday, September 10, 2007
Candy Sushi
 This recipe is originally from Rachael Ray, although I (of course) modified it. The green and red rolls are her recipe, which uses green fruit roll-ups and cherry Twizzlers. I also tried real dried cherries and melted dark chocolate, and orange/cherry/lime Sunkist fruit gel centers with dark chocolate "nori". They are all fun to make, fun to eat and great when you can't eat real (or at least raw) sushi. I made three batches tonight for Jamie... now I just need to figure out how to get them over to her before she heads home!
Candy Sushi
4 large marshmallows
1 T. butter
1/2 c. Rice Krispies cereal
2 green Fruit Roll-ups
1 cherry Twizzler, cut in 1/2
Melt marshmallows and butter in micro or in saucepan until smooth, then stir in cereal. Let cool slightly, divide in 1/2 and spread out on Fruit Roll-ups. Put a Twizzler in the center of each roll and cut to fit. Roll up. Chill slightly, then slice.
If using chocolate for the candy "nori" divide Krispie mixture and spread out on the Fruit Roll-ups paper (makes perfect template). Put dried cherries or other candy of choice in center and roll. Then, roll in melted dark chocolate, transfer to plate and chill slightly in fridge before slicing.
Subscribe to:
Posts (Atom)
LinkWithin
